How to create SmartOS Windows VM
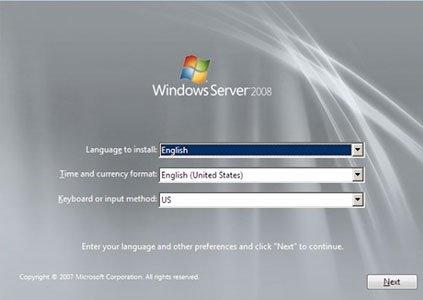
First you need to get the pkgin Tool ready to install some needed binaries like git and mkisofs for creating the smartos-vmtools:
cd /
curl -k http://pkgsrc.joyent.com/sdc6/2012Q2/x86_64/bootstrap.tar.gz | gzcat | tar -xf -
pkg_admin rebuild
pkgin -y up
pkgin in scmgit-base gcc47
pkgin install cdrtools-3.01alpha07nb1
move to your /opt dir and get the latest smartos-vmtools sources:
cd /opt/
git clone git://github.com/joyent/smartos-vmtools.git smartos-vmtools
Build the iso which will be needed from source:
cd /opt/smartos-vmtools/
./bin/build-image
Create an empty KVM instance:
vi vmspec.json
{
"brand": "kvm",
"vcpus": 2,
"autoboot": false,
"ram": 2048,
"disks": [
{
"boot": true,
"model": "virtio",
"size": 40960
}
],
"nics": [
{
"nic_tag": "admin",
"model": "virtio",
"ip": "192.168.210.50",
"netmask": "255.255.255.0",
"gateway": "192.168.210.1"
}
]
}
vmadm create < vmspec.json
Replace the "YourInstanceUUID" with the one you received after adding the empty KVM machine.
cp cache/smartos-vmtools-20120911140922.iso /zones/YourInstanceUUID/root/
cd /zones/YourInstanceUUID/

vmadm boot YourInstanceUUID order=cd,once=d cdrom=/win2008_re2_multi.iso,ide cdrom=/smartos-vmtools-20120911140922.iso,ide
Switch into your VNC Session for example via web browser driven Project FiFo and follow the screen.
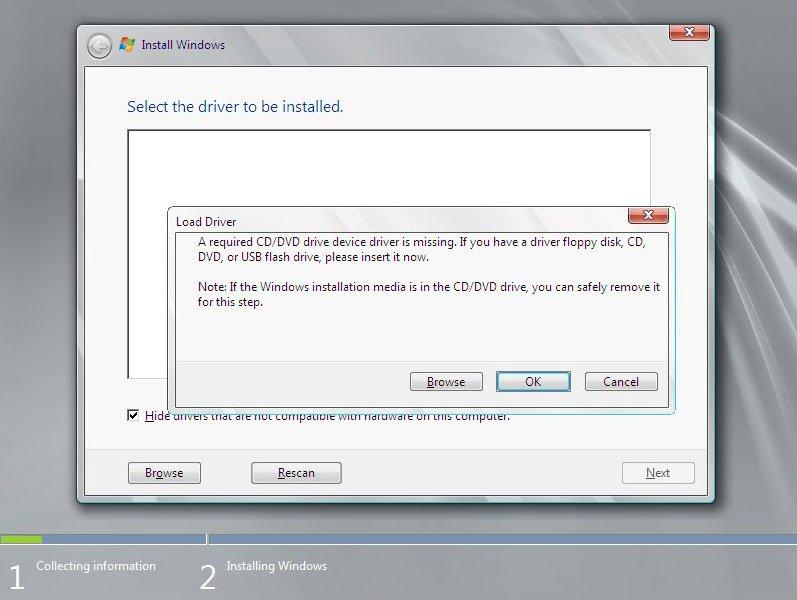
Windows 2008 will not find the virtual hard disk unless you load the disk drivers which we built before to an iso.
Select browse driver and choose the smartos-vmtools CD-ROM and enter the directory windows -> drivers -> viostor -> Win 7
after that drive should be recognized. After several reboots when windows 2008 is done installed, don't forget to install the Nic drivers via device-manager the same way we did before with the disk driver but now under directory windows -> drivers -> NetKVM -> Vista.
Finally open the smartos-vmtools CD-ROM in your file browser start the install.bat under directory windows switch to drive C: directory smartossysprep and edit the windows2008r2.xml there you can change the default administrator password and stuff. Then finally run the sysprep.bat. After finish execution your system will shutdown. The system is now ready.
Prepare the instance for creating image dataset now:
rm /zones/YourInstanceUUID/root/win2008_re2_multi.iso
rm /zones/YourInstanceUUID/root/smartos-vmtools-20120911140922.iso
cd to /zones/ or some other place with enough space and create the image:
zfs snapshot zones/YourInstanceUUID-disk0@image
zfs send zones/YourInstanceUUID-disk0@image | gzip > win2008_re2.zvol.gz
Generate the SHA1 key which we need for the manifest file:
shasum win2008_re2.zvol.gz
Generate a Custom UUID for your Image, your creator_uuid
You can do this by an UUID Generator like: UUID Generator
Now you need to create a manifest file. all except "type : zvol" need to be modified.
So take this example and replace the UUID, creator_uuid and vendor_uuid with the one you've generated before.
The size for the size field you simply get by entering ls -l in your shell:
create your new manifest file for your dataset:
vi win2008-re2.dsmanifest
{
"uuid": "YourFirstGeneratedUUID",
"name": "Windows",
"version": "2008.re2.dc",
"description": "Windows 2008 RE2 Datacenter Edition",

"os": "windows",
"type": "zvol",
"platform_type": "windows",
"cloud_name": "ispireme",
"urn": "ispireme:ispireme:windows:2008.re2.dc",
"generate_passwords": "true",
"users": [
{"name": "administrator"}
],
"creator_name": "ispireme",
"creator_uuid": "YourSecondGeneratedUUID",
"vendor_uuid": "YourSecondGeneratedUUID",

"created_at": "2012-09-11T17:00Z",
"updated_at": "2012-09-11T17:00Z",
"published_at": "2012-09-11T17:00Z",

"disk_driver": "virtio",
"nic_driver": "virtio",
"files": [
{
"path": "/zones/win2008_re2.zvol.gz",
"sha1": "YourGeneratedFileSHAID",
"size": 2932294629,
"url": "http://localhost/datasets/YourUUID/win2008_re2.zvol.gz"
}
],
"requirements": {
"networks": [
{
"name": "net0",
"description": "admin"
}
]
}
}
Finally load the image into the dataset container:
imgadm install -m win2008_re2.dsmanifest -f win2008_re2.zvol.gz
And you are done.
Thanks for your sharing.
Great help for me.
You are welcome. I’m doing my best 😉
I guess you start this process from / rather than /root? Root home quickly fills and write fails… I was just concerned there is no backup instructions. This is a great how-to. What should you do before trying something potentially dangerous? (and need to recover?)
Thanks!
I prefer to work in /opt. And well sure you have to check for sufficient diskspace before you install anything on mount based operating systems.
But that applies to every *nix and linux distributions.
I was having difficulty getting the Windows to recognize my virtual hard disk. I wanted to share with you what I found as a workable solution… I located a pre-built iso image that contains the drivers required at this link http://alt.fedoraproject.org/pub/alt/virtio-win/latest/images/bin/
I substituted this image for the smartos-vmtools.iso we had built in the previous steps. After navigating down through the folders and selecting the virtio driver, the Windows install was able to complete.
Hi Mark,
good to hear that this works for you. im wondering that your virtual disk was not recognized. I tried this solution several times already. the fedoraproject iso contains almost the same binary drivers than smartos uses for it’s smartos-vmtools + some useful custom sysprep scripts.
will you provide me your windows version you are using?
RealVNC did not work for me. TightVNC works like a charm! Just a heads up for peeps using a VNC client from Windows.
alternativly you could control your vnc sessions via web with fifo: https://ispire.me/fifo-smartos-gui-web-management/
You can also just download the vmtools ISO from here:
https://download.joyent.com/pub/vmtools/
yes that is possible and new!
Any thoughts on why SmartOS can’t find the vdisk after creating a new VM based on this image?
It’s 100%ly driver related. Have you select the correct driver on install?
If that doesn’t work you can also try it with the prepared iso from joyent: https://download.joyent.com/pub/vmtools/
Good luck!
There is an error in the instructions for making the template. As mentioned on https://wiki.smartos.org/display/DOC/Managing+Images when creating a KVM image you should put -disk0 in the zfs snapshot command otherwise it does not backup the correct volume.
Where you see that? Its there?!
There is a typo
> zfs send zones/YourInstanceUUID-disk0@image | gzip > win2008_re2.zvol.gz
should be
> zfs send zones/YourInstanceUUID-disk0@image | gzip > win2008_re2.zvol.gz
:-).
WordPress did not translated the notation correctly. Fixed! 😉
Anyone tried Windows 10?
For me its stuck at installl (windows log)
*logo